Workspace : A fully prepared work area should be organized before the sensitizing procedure begins. A light-safe area is best for sensitizing the fabric, paper, etc. For drying, establish a drying area in a totally dark room.
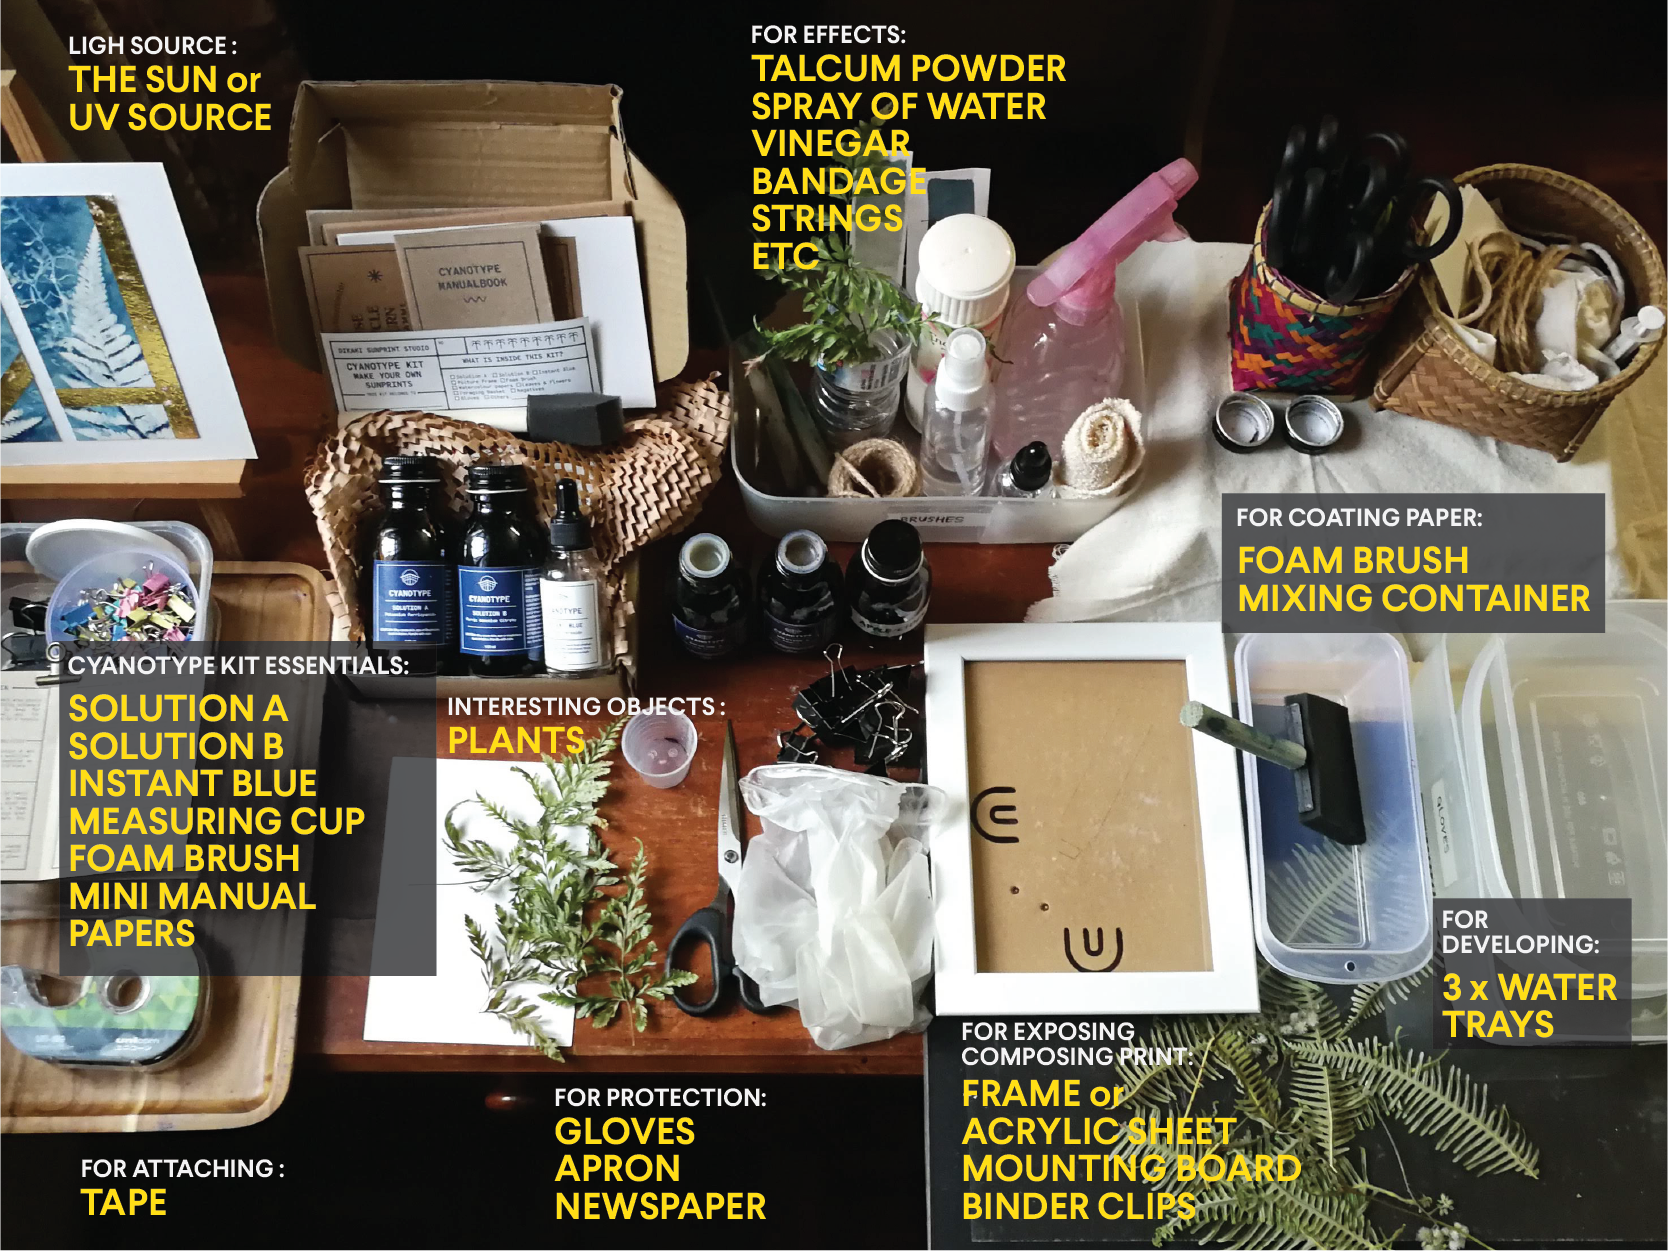
Here's what you materials and tools you need before we begin. If you have purchased our Basic Cyanotype Kit, you will already have these items:
- Solution A (Potassium Ferricyanide)
- Solution B (Ferric Ammonium Citrate)
- Instant Blue (Hydrogen Peroxide) *upon availability
- Measuring Cup or Syringe
- Foam brush (any brush would do)
- Watercolour papers (ours is 300gsm cold pressed,100% cellulose, acid free)
- Sandwich Contact Frame *Transparent acrylic A5 sheet, mounting board. 4 round clips or alternatively, picture frame)
Other things you might need
- 1-2 Water trays or working sink (to develop prints)
- Container (to mix ingredients)
- Newspaper (to cover surface)
- Apron or old shirt (to wear)
- Gloves
- Cleaning cloth / Rags / Napkins
- Assorted leaves, flowers or found objects of choice
- Sunshine or UV light source
Optional for abstract effects:
- Talcum powder
- Spray of water
- Vinegar
- Bandage
- Strings
- Transparent plastic wrapper
- Etc!
Here's what my workspace looks like to give you a mental picture:

Okay, so let's begin!
1. MIX YOUR CYANOTYPE SENSITISER
In low lighting, mix equal Solution A and Solution B to create the cyanotype sensitiser. Mix only the amount you need in a container as the sensitiser is stable for just 2-4 hours.
Extra notes: I would prepare roughly 2.5ml of Solution A and 2.5ml of Solution B to make roughly 3-4pcs of A4 prints. I will make sure my brush is dampen with tap water, emphasizing on dampen here. to make the coating process smoother and washed off easier by end of the process.
2. COAT YOUR PAPER
Still under low lighting, coat paper of fabric with the sensitiser. Tungsten light, as found in most light bulbs is fine. Use a brush to evenly coat your cyanotype solution. A foam brush however will give you that nice even coat. Then, allow it to dry in the dark. Dry coating should be bright yellow.
Some tips:
Dry the first coating before applying second coating.
Double coating is to ensure deeper shadows.
3. MAKE YOUR PRINT
Place object/ film negative on the coated surface to create an image. You may sandwich the paper and objects between a piece of glass & mounting board to keep the image sharp.
Leave them under the sunlight for 1-30 minutes or under UV light source, depending on how bright the light is.
Over exposure is generally preferred to under exposure. The exposed part of the print should look pale bronze in colour after adequate exposure. Areas where light does not hit sensitized material will remain white. This will let you know the print is ready to wash.
4. WASH THE PRINT
Next, rinse the paper for at least 2 minutes or until yellow residue is gone from non-exposed areas. Use a tray of cool water if you don’t have the use of a running tap. This final process helps to fix the exposed image and make it safe to view in daylight.
Note: If you do not have water at hand, just place the exposed paper back in a box to wash later.
5. DRY THE PRINT
After washing, leave the print to dry. It will still be a weak, silvery blue. Don’t worry, the blue gets darker as it dries.
OPTIONAL: To instantly oxidise the print to its final colour, simply submerge the print in a dilute bath of Hydrogen Peroxide after washing, then rinse and dry.
Too much instructions? Fear not, I've prepared a video tutorial to solve your headache! *grins
